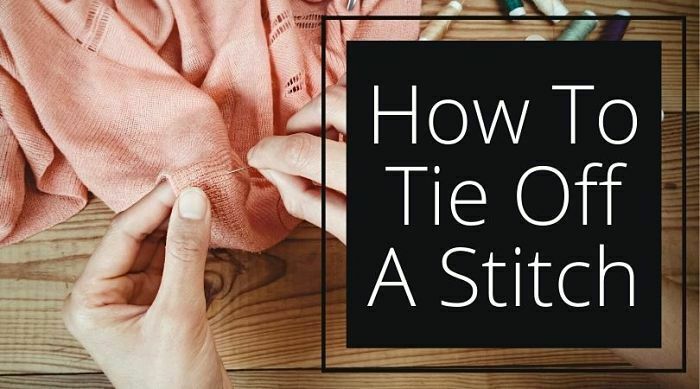
How To Tie Off A Stitch
POV: you’re a beginner sewer and have just braved the first task of sewing a seam. You’re at the end, and now you must finish and tie off your stitch so that the seam does not come undone. Or perhaps you’re a pretty experienced seamstress, but your tie off doesn’t work for every fabric or every stitch. All sewing enthusiasts should know how to tie off a stitch, but in order to really level-up your craft, you need to learn the multitude of options there actually are for a tie off.
But why learn more than one method for finishing your stitch?
With the bevy of fabric and thread types out there, there are always ways to tailor your sewing to each one. When finishing off a stitch, a large knot will add bulk to a lightweight fabric or a delicate seam. If you’re sewing an invisible stitch, learning how to hide the knot and make the seam extra secure will leave your projects with a professional look.
And, if you’re just starting out, sometimes it helps to lay out multiple techniques and see which one is easiest for your first few projects. That way, you can just get moving on making things.
Before you tie off your stitch though, you have to make sure you have a good foundation.
The Preparation
If you truly want your seam to be as secure as possible, you should not only tie the stitching off at the end, but also make sure it’s secured at the beginning. If you haven’t done this step, here’s a quick run-down:
Beginning the Stitch by Machine
If you’re using a sewing machine, you can use the same function at the top as you can at the tail of the stitch. If your machine has a backstitch button, you should use that to begin your stitch. If your machine is older and doesn’t have a backstitch button, you can also shorten your thread length to the shortest option and sew a few stitches like that.
Keep reading below for more in-depth instructions on backstitching on a machine.
Beginning the Stitch by Hand
Method one:
- Thread your needle, leaving ample extra thread on both sides. If you’d like a single threaded seam, leave one tail longer than the other. If you’d like a double threaded seam, pull the tails to equal lengths.
- About 2 or so inches from the end, tie a simple knot by looping the thread over itself and tucking the end through. For fabric with a large weave, knot the thread twice.
Method Two:
- Thread your needle the same way as before.
- About a half an inch from the end, lay the thread against your pointer finger. Then lay the needle on top of the thread.
- Pushing the two together, guide the tip of the needle around and around the end of the thread. Essentially, you’re wrapping the thread end around the needle, about 5 or 6 times. The more you wrap, the bigger the knot.
- Keeping the thread end between your fingers, push the needle through the wrapped thread area and draw the rest of the thread through it as well.
- Once the thread reaches its own end, it should tighten up and leave a knot.
You can use either of these two methods, or your own. Now it’s time to sew your seam and then tie off the back end.
Tying off a Stitch on a Machine
1 – Backstitching – Basic Machine
On a basic modern machine, there is usually a reverse tab with a symbol that looks like an arrow pointing in a small semi-circle. It may have a different appearance on your machine, so make sure to read your machine instructions to get accurate information.
To use this function, stitch to the end of your seam, then hold the button or tab down and allow your machine to stitch backwards for 3 to 5 stitches. Let go and stitch to the end again, then remove the seam and cut the threads.
2 – Backstitching – Advanced Machine
Some machines with more advanced controls will have a backstitch button that does all the work for you. When you get to the end of your seam, you can press the button and the machine will stitch backwards and forwards without you having to hold it down.
3 – Backstitching – No Backstitch Function
Older sewing machines often may not come with backstitching tabs or functions, but this does not mean that you cannot achieve a secure stitch. As stated above, one option is to change your stitch length to the shortest length possible and stitch the ending of the seam through. But if you also do not have the ability to switch to a small stitch length, you can remove your fabric and finish the threads by hand using one of the multitude of methods below. Just make sure to leave about 3 to 5 inches of thread at the end of the seam to do so.
Tip: Even if your machine has a backstitch function, some fabrics may not move well through the machine in both directions. Or, a backstitch on a machine may add unnecessary bulk to a lightweight fabric. In these cases, you can also use the hand finishing techniques, giving your sewing projects a cleaner and more professional look.
Tying off a Stitch by Hand
As mentioned before, there are many ways to tie off a stitch, and really no “official” way to do so. Below are a few methods for you to experiment with to get you started or propel you to the next level.
1 – Simple Backstitching
Just like on a sewing machine, backstitching is also possible by hand. You may already know how to backstitch if you like to use the stitch as a seam, but if not, it’s only two steps.
- Once you get to the end of your seam, bring the needle back and insert it into the fabric a little behind where your last stitch began. Pull it out halfway through that same stitch.
- Create another stitch by going back now to the penultimate stitch, coming out halfway through it.
- Repeat for 3 to 5 stitches, and then continue with normal stitches to the end again.
You may also end the stitch with the backstitches, as forward stitching may add bulk. However, that will be less secure than following the above steps.
Tip: The smaller your backstitches, the more secure the seam will be.
2 – Knot by Hand
In this method, you’ll need about 3 to 5 inches of each thread left at the end of your seam.
- Remove the thread from your needle and create a loop with the thread as close to the fabric as you can manage.
- Tie a basic knot by looping the thread over and through itself.
- Take the knot between your fingers and pull downwards until the knot travels all the way down to the fabric.
- Repeat if you’d like, as more knots will add security (and bulk).
- Trim the ends of the threads to about ¼ inch.
3 – Knot with Needle (Option One)
This is where the finishing gets a little funky, but also quite a bit cleaner. Once you master these two options, they’ll come very naturally.
- If you have a wrong and right side of your seam, flip the fabric over to the wrong side. Make sure your needle is coming through to the wrong side.
- Insert your needle underneath the previous stitch almost perpendicularly, not catching any fabric. Slide your needle under the stitch away from your body.
- As you pull the needle through, your thread will form a loop. Bring the needle back towards you and slide it through the loop, again away from you.
- Pull the thread until the knot forms and tightens on the stitch.
- Repeat the process through that same stitch if you’d like a double knot.
- Trim the thread about ¼ inches from your knot.
Tip: This knot is great for topstitching, or anything where you don’t want a knot to show on one side of your fabric.
4 – Knot with Needle (Option Two)
This second needle knot catches a bit of fabric in the process, making it good for heavier fabrics and extra security.
- Sew all the way to the very end of where you want your seam to be.
- Insert the needle into the fabric very close to the exit point of your last stitch.
- Catch a few threads of fabric close to the line of your seam.
- Pull the needle through slowly and lightly to create a loop with the thread.
- Thread your needle through the loop and pull until the knot slides down to the fabric.
- Repeat another time for added security.
5 – Hidden Knot with Needle
This technique is an add on to method four, for use when doing an invisible stitch, also sometimes known as a hidden stitch, a ladder stitch, or slip stitch.
- At the end of your stitch line, follow the steps above to create a knot (or two) by catching the fabric.
- Once you’ve tied your knot, slide your needle between the sides of the seam you are stitching and bring it out through a nearby spot on the fabric.
- Cut the thread tail close to where it exits the fabric and then wiggle it a bit so that the thread tail disappears inside.
6 – Hidden Knot on a Machine Seam
As mentioned before, sometimes you’ll want a clean finish to your machine seams, especially when topstitching. If you are doing a topstitch and need a simpler and less bulky method than backstitching, follow these steps.
- After finishing your seam on your machine, remove the fabric and snip the threads with 3-to-5-inch tails.
- Flip your fabric over to the wrong side. You should have one thread tail on this side, and one on the other.
- With a needle tip, lightly catch the loop of the final stitch and pull the thread through from the right side of the fabric. If you have trouble finding the loop, take the thread tail on the wrong side and pull it up slightly to loosen the stitch. After you pull the thread through, both tails should be on the wrong side.
- Using your hands, tie a simple knot (method two) with the two thread tails and tighten until it sits against the fabric. Repeat as many times as desired.
- Trim the ends of the thread to about ¼ inch long.
Bonus: If you’d like to hide the tails instead of leaving them out, you can add on the below steps. Just don’t trim the thread tails and proceed from step four.
- Thread both your tail ends through the eye of your needle, leaving as much as possible on the fabric side to work with.
- Weave the tip of your needle back through the last couple of stitches, taking a bit off fabric near each stitch as you go.
- After 3 or 4 stitches, catch a few threads of one layer of fabric and pull your needle through.
- Trim the tails as close as you’d like to your stitches.
7 – Double Thread Options
When hand sewing, you may also sometimes sew using double thread – simply by keeping the tail two tails of thread equal in length. After securing your stitch at the beginning as described above, you can then finish the stitch using any of the hand sewing methods.
Keep in mind that because you’re sewing with two lengths of thread, the options that catch fabric may add a lot more bulk than desired. With thicker fabrics that may be fine, but simply tying a knot by hand – like in method six – could be a better option.
Things to Consider
As detailed throughout this guide, there are a few things to consider when choosing what stitch works best for what project. Try to always think about fabric type, thread type, and what seam you’re sewing before you jump into your default tie-off.
Also, this is not an exhaustive list of every method out there. It’s a great resource for both beginner and advanced seamsters, but truly bringing out your full potential requires research, experimentation, and making mistakes. That’s the best part about learning this kind of sewing technique – if you think you want to make a new choice, you can. Just snip the knot and trying something new.
Meg Stoll Tron is a writer and hobbyist from Petaluma, California. Always interested in fashion, Meg began sewing in college for theatrical productions and later moved on to making whatever creations struck her fancy. Meg loves using found fabrics, draping her own designs, and sitting by the fire with a nice hand stitching project.