Best Beginner’s Serger Tips
Here are some of the best beginner’s serger tips for getting started with a serger, aka overlock machine. Bringing home your first serger is a big step toward expanding your sewing skills. Producing professional-quality garments, bedding, and other projects.
Many sewing enthusiasts, including you, may have successfully managed to create wonderful pieces without the benefit of a serger. But most serger owners insist that switching to a serger opens a whole new world of possibilities that sewing machines just can’t offer you. Here are a few tips to get you started on this new sewing adventure.
Start At The Beginning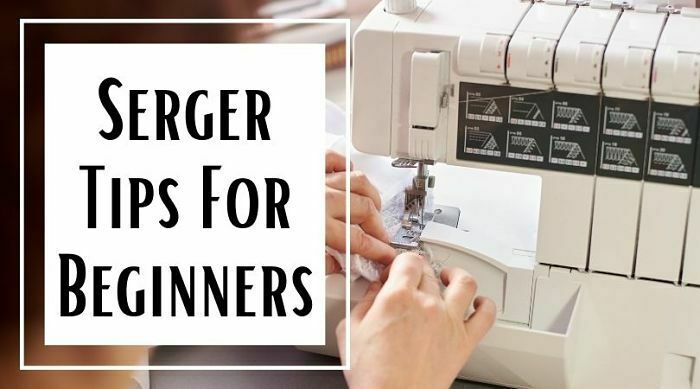
Sergers are entirely different animals than even the most complex sewing machine, so don’t jump in cold. Use the owner’s manual to familiarize yourself with your new machine’s parts and features. Make it your friend until you get comfortable with the machine.
Most new sergers also include instructional videos, so take advantage of it. Watching someone else perform various tasks and use different features will help you better understand the written instructions.
Thread The Machine
With four thread spools, two needles and a bewildering array of settings, your serger is obviously a complicated machine. Learning to thread one can be an intimidating procedure, but the best way to learn how to do it right is to do it.
The owner’s manual and video will both contain instructions on threading the machine, usually using the pull-through method. This allows you to change threads without completely re-threading the machine. It’s not hard to learn and it’s a great time-saving method if your machine doesn’t include a self-threading function. However, it’s important to practice basic threading too. The inside cover of the machine may include a threading guide.
Give It A Try
Once you’ve successfully threaded the machine several times, the next step is to run some fabric through it. Refer to the owner’s manual and try out each feature and function. Some of the more complex functions may involve swapping out a part or two, but it’s good practice.
Maintain a slow, steady speed and pay attention to your accuracy. Keep your eyes on the blade, not the needle as on a sewing machine. The blade’s function is permanent, so guide your fabric according to where you want it cut. There is no backstitch function on sergers, so you’ll have to knot the thread when finished.
Practice
Using scrap fabric, practice sewing with your serger, learning how to use the differential feed. The differential feed on a serger adjusts the speed of the front feed dog, so it feeds fabric to the rear feed dog at different rates. This feature is vital for preventing unwanted gathering and puckering.
The differential feed needs to be adjusted for seaming different fabrics. For example, serged seams on knit fabrics have a tendency to wave at neutral settings, or you can use the differential feed to create gathers in lightweight materials. Experimenting with scrap fabric helps you understand how to use this important feature of your serger and make the flat or gathered seams you want.
Keep It Clean
Sergers generate more lint and fluff than sewing machines, and this debris needs to be removed to keep the serger working correctly. Most manuals instruct you to oil the machine regularly, but if a serger isn’t cleaned, the oil can catch lint and dust and become clogged.
After every use, use a microfiber cloth to wipe down the serger, removing excess dust and lint. Use a lint brush to sweep lint out of narrow crevices and small areas.
Do not use canned air or a dust blower because it may force lint deeper into areas you can’t reach to clean; cover your serger when it isn’t in use to prevent dust accumulation.
A few times a year, remove the stitch plate, lower the upper blade, clean and remove lint around the blades and feed dogs. Once you have cleaned the serger, oil it according to the instructions in your manual.
The Really Important Tips
Everyone develops their own style, pace, and tricks when using a serger. But no matter how you will eventually prefer to use your machine, the following do’s and don’ts are practical, universal tips.
- Sewing over pins is a bad habit when using sewing machines. Doing it on a serger is a sure recipe for disaster. A serger cuts the fabric as it sews, which means learning to sew without depending on pins or pinning much further away from the edge.
- Taking is slow might seem hard, especially if you’re used to speeding along on your sewing machine, but there’s no way to start over after the fabric has already been cut.
- Invest in good thread when you’re ready to tackle your first project. The machine will do its job better and there will be far less chances of thread catching or breaking as you work.
- If you haven’t fallen in love with the tweezers you used while practicing threading, it’s time you did. They’re useful for many tasks, including helping to untangle thread that shouldn’t be tangled.
- Read our beginner’s guide for selecting the right serger.
There’s a definite learning curve involved when starting out with a new serger, but once you get some experience with it, your serger skills will rock.
Take Threading Pictures When Your Serger First Arrives
Most sergers come pre-threaded from the factory. Therefore, it’s always a good idea to begin by carefully taking detailed images of the pre-existing threading, comparing it with the diagrams, and understanding how the machine is threaded before you start. These pictures may later serve as a good visual reference and reminder for your own threading.
Change Needles Often
Make sure you are using the correct needles for your serger that are new and sharp. Many serger issues that seem like thread or tension problems are due to old needles.
Remove unused needles when using fewer threads. It may be tempting to leave both needles in place even if you are only using one, but go ahead and remove the unused one. Even if you are only using one, having both needles in the machine causes uneven stitches and tension problems, so use your included screwdriver to take it out.
Best Entry Level Sergers
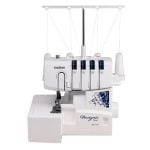
Brother Designio Series DZ1234 Serger 
- This serger machine is on the cheaper end of the serger spectrum and is the best beginner serger machine
- This serger comes with a blind hem stitch foot, gathering foot and piping foot
- You can use this machine to sew 1,300 stitches per minute
- The machine comes with two sets of free thread to get you started
- It is compact for small spaces but powerful enough for a vast range of sewing projects
- Easy to use for learners and beginners
Here we have a high quality serger machine that comes in at a rather affordable price. First of all, it features both 3 and 4 thread capabilities, which does make it quite versatile. Moreover, it also features several built in stitches to choose from, more than enough for most tasks.
What also stands out about this unit is how easy it is to adjust. The differential feed dog is super easy to adjust, and the adjustment range is quite wide too. The same can be said for both the adjustable stitch length and width too.
Now, the Brother DZ1234 does come with a color coded threading system. That said, the threading is not automatic, and can be somewhat difficult. However, what does stand out about this unit is that it comes complete with standard sewing machine needles, a convenience factor no doubt.
Moreover, the fact that it comes complete with interchangeable feet is a pretty big bonus too. The Brother DZ1234 also comes with a free arm. This makes it easy to work on a variety of cylindrical garments, such as sleeves.
We do like how this unit features a really solid build. It is quite durable, and it doesn’t vibrate much either. That said, keep in mind that it is quite heavy, almost 20 pounds.
Pros
- Compact size for portability
- Great price
- Many built in stitches
- Highly adjustable
Cons
- Can be a bit difficult to use
- Threading is 100% manual
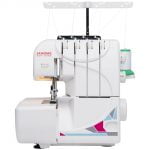
Janome MOD-Serger with Lay-In Threading
- This is an affordable serger machine
- It comes with 3 and 4 thread options
- Other features include easy lay-in threading, quick change rolled hem, and adjustable foot pressure
One thing that stands out about this unit is that it weighs just over 13 pounds. As far as sergers are concerned, this is actually fairly lightweight. It’s also not the largest unit around, thus making it quite portable. That said, it does have a limited working area due to that small size.
However, what does stand out is that the 8002D features both 3 and 4 thread capabilities. This serger can perform many stitch types including chain, flatlock, overlock, rolled hems, cover hems, and more. It also features high quality fabric knives.
You may also like how the Janome 8002D feature a differential feed that can be adjusted from 0.54 to 2.25 mm. That is a pretty wide range. The cutting width can be adjusted from 3.1 to 7.3 mm, and the stitch length can be adjusted from 1 to 4 mm.
You should also appreciate how this unit comes with a simple tension dial for thread tension adjustments. All in all, the 8002D is very easy to use, and a big part of this has to do with the color coded threading system.
Pros
- Quite small, lightweight, and portable
- Very versatile due to all of the features it comes with
- This unit is built for user friendliness
- Many accessories included
- Reasonable price
Cons
- Threading is 100% manual
- Not the most space to work with
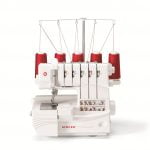
SINGER 14T968DC Professional 5 5-4-3-2
 This is a more expensive machine
- This singer lets you go up to 5 stitches
- You can use this machine to create 1300 stitches a minute
- This machine comes with an easy threading diagram and a fully adjustable tension system
Right off the bat, what many people love about this serger is the fact that it comes in at a very reasonable price. Although the price is reasonable, it still has some great features worth talking about.
First off, this serger has two, three, and four thread capabilities. This automatically makes it very versatile. On that note, this unit is capable of performing nearly a dozen different stitch types, which is not too bad either. In terms of speed, expect to get around 1,300 stitches per minute out of the 14CG754.
Another bonus with this serger is that it is fairly lightweight and portable. It comes in at just over 13 pounds. That said, the working area is not the biggest, so it’s not ideal for very large projects.
Here, the cutting width can be adjusted from 3 to 6.7 mm, as the stitch length from 2 to 4 mm. Moreover, the differential feed can be adjusted from 0.7 to 2 mm. This unit does not feature the biggest adjustment range of all, although it’s not too bad.
Something that is going to make your life easier here is the color coded threading system. One notable downside with this unit however is that the threading is 100% manual. There’s also the fact that the warranty is rather poor.
Pros
- Fast stitching
- Quite easy to use
- Instructional video included
- 2, 3, and 4 thread capabilities
- Many stitch types
- Great price
Cons
- Threading is 100% manual
- Somewhat poor warranty
- Adjustment ranges are not huge
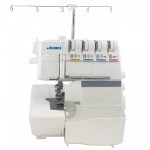
Juki Mo 735
- This serger has a rather hefty price tag
- Color coded threading
- You can control this serger with the touch of one button
- All accessories are included
One of the biggest standout features of this serger is that it can perform over 1,500 stitches per minute. This makes it by far the fastest serger on our list today. This does of course make it quite efficient.
Another huge feature here is that the MO-735 is made out of super durable materials. It has a really solid frame, so you can rest assured that it will last for a long time to come. Another bonus is the fact that it is also very quiet and barely vibrates during use.
In terms of versatility, this serger is also fantastic, mainly because it has two, three, four, and five thread capabilities. This allows the Juki MO-735 to perform 24 different stitches. Speaking of stitches and thread, the color coded threading system combined with automatic looper threading certainly helps make things easier.
The MO-735 is also ideal for thick fabrics, which is thanks to the extra high presser foot lifter it features. In fact, the presser foot is a multi-function model. Next, the cutting width, stitch length, and differential feed are very easy to adjust as well.
Pros
- Very fast operation
- Extremely durable
- Quiet and vibration free
- User friendly
- 2, 3, 4, 5 thread capabilities
- Many stitches to choose from
Cons
- Switching sewing modes can be hard
- A bit heavy
Conclusion
Serging is a great way to get fast, easy, professional seams and hems on a vast range of sewing projects. It’s also the best way to work with knits and more difficult fabrics that need to move and stretch.
A serger can be intimidating for beginners because they are more complex and multifunctional than a typical sewing machine, but don’t let that stop you from getting an overlock machine of your own. With some time and practice, you will soon be speeding along, creating professional finishes in half the time.
Reading our overlock machine reviews and following our serger tips for beginners will help you choose the right serger for your needs, overcome the learning curve, sew quickly and successfully, and get the best use and performance from your serger for years to come.
However, it’s always essential to study the manual and features of your specific machine and follow the manufacturer’s guidance for the use, care, and maintenance of your serger.

