How To Sew Binding On A Quilt
No art piece is complete without a frame, and therefore no quilt is complete without binding. This is, however, a tricky task that even the most skilled quilters still get wrong at times. Proper tools, a plan, and plenty of patience are needed to sew the binding on a quilt.
If this is your first time binding a quilt, you might want to read the information provided in this article to understand why we bind quilts, what we need to bind a quilt, and how to bind your first quilt. Good luck!
Why Do Quilts Need Binding?
Binding is an essential part of creating a quilt. It is the quilt’s outer edging and protects the finished quilt from wear and tear. Binding is made from cotton fabric and covers the raw edges of the quilt, hiding the stitches and pieces you don’t want on display.
Benefits of Binding a Quilt
Apart from looking attractive and protecting the quilt, what are the other benefits of adding binding to your quilt? Binding, also known as edging, is a fantastic way to add some color to a quilt.
Choose a color that contrasts and complements the colors you have used to make your quilt. Using the right colors can bring the whole look together. It can be done using any fabric and could even add a glam look to an otherwise plain quilt if you choose your edging carefully.
Think of your quilt as an art piece and the binding as the frame. You wouldn’t put a beautiful artwork in a tatty mismatched frame, and so you would not add a binding to your quilt that does not enhance the appearance and finish off the look.
What is Needed to Bind a Quilt?
You have completed your quilt, and now the time has come to do the binding. There are various tools you will need to bind your quilt. One can find the majority of these tools at your local haberdashery, or from larger craft and hobby stores that have a sewing section.
- Your completed quilt. This is sometimes referred to as a quilt sandwich due to the various layers that a completed quilt comprises.
- Fabric in the color and pattern of your choice (read on to see just how much fabric you will need).
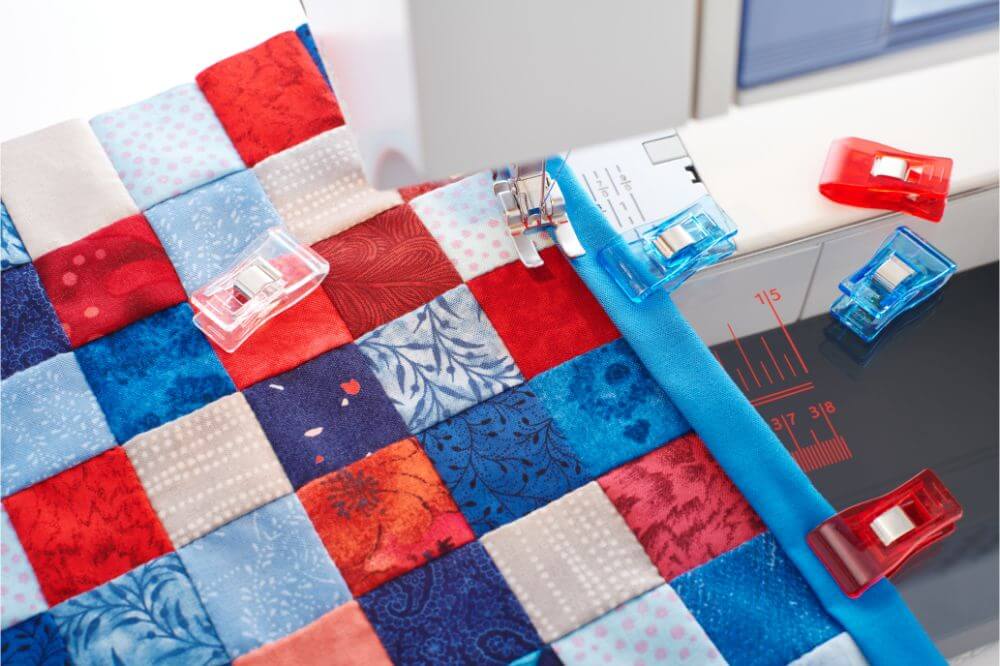
- Binding clips to clip your binding to your quilt for sewing.
- Thread in a contrasting or complementary color to those used in the quilt.
- A sewing machine or needle-and-thread to sew the binding on your quilt.
- A good pair of sewing scissors sharp enough to cut through a few layers of fabric.
Fabric: How Much Do I Need?
There is always a straightforward way and a difficult way to measure the amount of fabric you will need for your quilt. The best and recommended way to do this is to follow our formula below:
1. Measure the perimeter of your quilt, add the numbers together, and add on 20 inches.
2. Divide the total number in step 1 by the width of the fabric.
3. Multiply the total number from step 2 with the width of the strip you will cut to use to create your binding.
4. Divide the total number from step 3 by 36 to get the number of yards you will need to create your binding.
5. Cut your binding strips according to the measurements of your quilt and press them flat with an iron.
Handy tip: If you are creating your first quilt, buy an extra bit of material in case of mistakes when calculating or cutting your binding strips and edgings.
How to Sew Binding on a Quilt
Different types of binding can be used to bind your quilt. For this article, we will focus on the double-fold binding for quilts.
The first step in binding your quilt is measuring and cutting your fabric strips, as explained in the previous section. The strips to be used in your binding should be done using the cross-grain method, which involves cutting the fabric width ways. If you are using a quilting kit, it will include a complete guide on how to do this.
Once you have cut and prepared your strips, tack or pin them to your quilt, making sure all the edges line up, and the corners are at 90 degrees. Iron the strips flat and fold them over. You can use a ruler to ensure your corners are accurate and measure diagonally across the corner, cutting the corner off. It helps to reduce the bulk when it comes to sewing your binding onto your quilt.
Before sewing, cut off any remaining bits of batting and other fabric that are sticking out of the edges of the “quilt sandwich.” Less batting and fabric leads to a smoother binding.
Attach your cut strips to form binding to the top of the quilt, stitching and folding the binding down as you move around the entire quilt. Fold the material down ¼ inch as you stitch. Keep the binding as straight and tight as possible as you sew, reducing bumps and lumps that could gather if you sew too fast.
Lastly, clean up the edging, ensuring no loose threads or openings in the binding. This step applies to you, too, for those who prefer to stitch the binding on by hand.
Final Thoughts
Whether this happens to be your first quilt or your fortieth, the procedure of sewing binding to your quilt never changes. However, as you make more quilts, it will become like second nature and can be completed without much thought.
If you are still unsure how to cut, fold or sew the binding to your quilt, there are online tutorial videos to follow. A quilting kit can turn sewing your binding from a nightmare into a hassle-free experience for beginners, so we suggest you start with a kit before you tackle this task blindly.