• Menu
  • Skip to primary navigation
  • Skip to main content
  • Skip to primary sidebar

Serger Pro

  • Home
  • Serger Machine Reviews
    • All Serger Reviews
    • Overlock & Serger Machine Brands
    • Brother Sergers
      • Brother 1034D
      • Brother 1034DX
      • Brother 1134DW Serger Review
      • Brother 1634D
      • Brother 2340CV
      • Brother 3234DT
      • Brother 5234PRW Serger Review
      • Brother Designio Series DZ1234
      • Brother ST4031HD
      • Brother XL 2600 Sewing Machine
    • Elna Sergers and Overlock Machines
      • Elna 664 Pro Serger Review
    • Janome Sergers
      • Janome 3434D Serger Review
      • Janome 8002D
      • Janome 6234XL Review
      • Janome Four-DLB Serger Review
      • Janome Harmony 7933
      • Janome CoverPro 900CPX
      • Janome CoverPro 1000CPX
      • Janome Magnolia 7034D
      • Janome MOD-8933
      • Janome MyLock 204D
      • Janome MyLock 634D
    • Juki Sergers
      • Juki MO-50E
      • Juki MO-104D
      • Juki MO-114D Serger Review
      • Juki MO-623
      • Juki MO-644D Portable
      • Juki MO-654DE
      • Juki Pearl Line MO-654DE
      • Juki Pearl Line MO-655
      • Juki MO-735
      • Juki MO-1000
      • JUKI MCS-1500
      • Juki MO-6716
    • Singer Sergers
      • Singer 14CG754 ProFinish
      • Singer 14J250 Stylist II
      • Singer 14SH654
      • Singer 14SH764CL Stylist
      • Singer 14T968DC
    • Tacony Sergers
      • Tacony AH100
    • Miscellaneous Serger Reviews
      • Bernina L460 Serger Review
      • Costway Serger Sewing Machine
      • Pfaff Coverlock 3.0 Serger Review
      • Toyota SL-1T Serger Review
  • Serger Comparisons
    • Best Embroidery Machines
    • Best Sewing Machines for Quilting
    • Best Sewing Machine For Beginners
    • Best Overlockers for Beginners
    • Best Self-Threading Sergers
    • Best Sergers With Coverstitch
    • Serger Vs. Coverstitch
    • Overlocker/Serger vs Coverstitch Machine
    • Serger Vs Serger
      • Brother 1034D vs. 1034DX
      • Juki MO644D Vs Brother 1034D Comparison
      • Singer 14SH654 Vs. Brother 1034D
      • Singer 14CG754 Vs. Singer 14SH654
  • Serger Guides
    • Beginner’s Serger Tips
    • Best Serger Accessories
    • Choosing the Right Thread
    • Serger sewing
    • Serger/Overlock Stitch Guide
    • Traveling With A Serger
    • Shopping for a Serger
      • 5 Factors to Consider Before Buying a Serger
      • Serger Sewing: Buying Your First Serger Machine
      • Understanding a Serger
      • Why I Love Sergers
      • Why You Need a Serger
  • About

How to Sharpen a Serger Blade

Sergers are fantastic for tailoring, fashion, upholstery, and everything in between. Sergers may be similar to sewing machines, but they have more components and capabilities.

How to Sharpen a Serger Blade

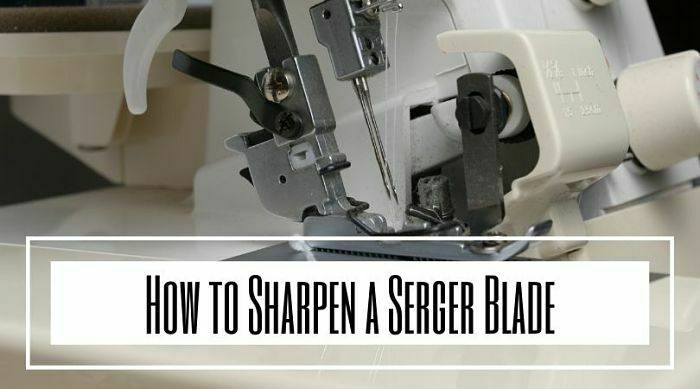
One of these differences is the knife or the blade, which a serger has, but a sewing machine does not. These knives or blades are essential for overlock stitching and similar purposes.

That said, those blades or knives will wear out over time. Likewise, using a serger with blades that aren’t sharp may ruin the garments or fabric you are working on.

This article will discuss whether or not it is possible to sharpen a serger blade. Once that issue has been addressed, we’ll then talk about sharpening a serger blade.

Can You Sharpen a Serger Blade? Should You?

Many people question whether or not sharpening a serger blade is possible. Moreover, they might then wonder if it’s not easier to just replace the blade.

Sergers have two blades – the top and bottom, which can be costly. Depending on the model, a single blade can cost up to $50; replacing two blades is not cheap. This is the main reason many prefer sharpening over replacing.

Sure, you can save money by doing your own serger blade sharpening. However, sharpening a serger blade is not easy. For one, you need the proper tools, including a small screwdriver to remove the blades from the machine. You will also need a sharpening stone. Generally speaking, a whetstone with a grit of 3000 or 4000 should do. Even with the right tools, the job itself is not easy.

Remember that serger blades act like scissors, so those two blades need to fit together perfectly. In other words, with your sharpening stone ready, you use the correct technique to sharpen them.

If you do it wrong, you’ll end up totally destroying them, which will warrant a replacement. Also, if the two blades don’t correctly fit together anymore, they won’t work right.

The bottom line is that sharpening a serger blade is possible with the right tools and techniques. However, many people take their serger blades to professionals for sharpening. It’s not rocket science, but it does take a bit of practice. You may very well ruin a blade or two before you get it right.

Remember: You can sharpen a dull blade, but if the blade is damaged, warped, or has nicks in it, it will need to be replaced.

How to Sharpen a Serger Blade

How to Sharpen a Serger Blade: Step-by-Step

Although sharpening serger blades might seem daunting, it is doable. This is particularly true if you practice a bit.

Let’s go through a serger blade sharpening tutorial. Our goal is to make the process as easy as possible for you.

Make sure that you have all of your tools ready. Once again, you will need a small screwdriver and a sharpening stone.

  1. Open up the serger case to get to the inside. You will see a front panel you can open; you may or may not have to unscrew this panel. With this panel removed, you should now see the blades.
  2. You will now have to use that little screwdriver to unscrew the blades from their housings. Make sure to examine exactly how and where they are attached. If you don’t take note of this, you might have trouble reattaching them once they have been sharpened.
  3. With the blades removed, lay them down on a hard and flat surface.
  4. With the blades flat, hold your sharpening stone in your hand. Ensure the sharpening stone, and the blades are parallel to one another. This is not like a kitchen knife where you have to grind an angle into the blade; you need both the stone and the blade to be perfectly flat.
  5. Take your sharpening stone and run it along the top and bottoms of the blades until the edges are sharp.
  6. Once you have sharpened both blades, insert them back into their housings and screw them back into place. Ensure that the screws are tight and secure; you don’t want the blades to come loose during operation.
  7. With the blades back in place, it is good to take them for a test run to ensure the sharpening process was successful.

Conclusion

Now that you know how to sharpen serger blades, you should be able to save a good deal of money in the long run.

Primary Sidebar

Featured Articles

Best Sergers
Best Self-Threading Sergers
Best Sergers With Coverstitch
Serger Threads to Buy
Must Have Serger Accessories Serger Projects for Beginners
How To Sew A Face Mask

Popular Reviews

Brother 1034D
Brother 1034D vs. Brother 1034DX
Brother Coverstitch 240CV
Brother DZ1234
Janome Mod 8933
Juki Portable MO-654DE
Singer 14sh654
Singer ProFinish 14cg754
Singer 14t968dc
SergerPro.com · About · Contact Us · Privacy Policy · Terms of Use · Disclosure · Copyright © 2024
Disclosure: sergerpro.com is a participant in the Amazon Services LLC Associates Program, an affiliate advertising program designed to provide a means for sites to earn advertising fees by advertising and linking to amazon.com.
7ads6x98y