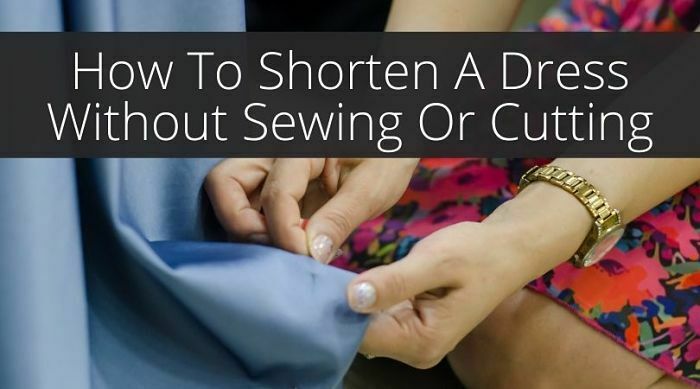
How To Shorten A Dress Without Sewing Or Cutting It
So you’ve begun your sewing or crafting journey, and are somehow faced with a dress that’s too long. Perhaps a friend is asking for an alteration and you don’t feel too confident with a needle yet. Perhaps you’re going to a formal event while visiting family and don’t have your machine on hand. Or perhaps you’re on a film set and an actor’s costume needs a speedy fix before the camera starts rolling. Whatever the case, you’re in need of some quick tailoring.
Tailoring your own clothing is an incredibly useful skill, as there’s truly nothing better than having clothing fit the way you want it to. Unfortunately, sewing and tailoring are skills that can’t be learned quickly; it takes time and effort to craft something well-fitting. Even just taking in a shirt or adjusting a waistband is often a meticulous process. However, there are ways to adjust your clothing even if you have little to no sewing experience. With the wealth of information online now, altering your garments is no longer a task for only the most skilled of tailors.
Shortening a dress is a great introductory task for any hobbyist to learn with. Even if you have never touched a sewing machine, there are methods you can use to shorten your dress without any sewing whatsoever. Depending on the tactic and what you want, you can achieve a temporary or permanent fix. Before you jump into tailoring though, you must first determine how short you’d like to go.
The First Step: Marking your new length
To ensure you have an even hem on your dress, you’re going to need to mark where you want the garment to fall. This is easiest done with a helping hand, and requires a couple tools to do properly.
What you’ll need:
- A tape measure
- Tailor’s chalk
- Safety pins
Partner Method
- If you have someone to help you out, put on the dress and stand in front of them with equal weight on both feet. If you’re shortening a floor length dress for an event and you’ll be wearing heels, make sure to wear your heels. Otherwise, stand without shoes on with your feet hips-width apart.
- Next, show your partner where you want the dress to fall. This is best done using a mirror, as bending over to point while wearing the dress will cause discrepancies in measuring. You can have your partner fold the dress to simulate how it will look, or safety pin it in a few places so you can walk around and test it out. Just make sure to unpin before measuring.
- When you find your desired length, hold the tape measure at zero on your waistline.
Tip: If the dress doesn’t have a waist seam, you can keep the measurements consistent by tying a piece of string around your natural waist, then measure from that point.
- Once you’ve got the tape measure at your waist, have your partner measure down to the desired hem and note that number. Then, they should mark it with chalk. Measure a few points around the circumference of the dress (just enough for a consistent line). Once you take the dress off, you can join the markings with the chalk on a flat surface for a clean line.
If you don’t have anyone to help, you can use the method below:
Self Method
- Stand wearing your dress in front of a mirror. Again, if you’ll be wearing heels that will affect the length, wear them now.
- Identify where you want the dress to fall by looking in the mirror, then insert a safety pin at that spot. Stand straight back up again and check that it’s in the desired place. Keep adjusting the safety pin until you find the right length.
- Remove the dress and measure from the hem up to the safety pin and note the length, marking with chalk.
- Mark around the rest of the dress with the chalk using that measurement from the hem upwards. Join the markings on a flat surface to create a line.
- At this point you can also now fold the dress up inside itself and secure with safety pins to simulate your new length. Then try the dress on again. This is a great way to confirm how it will look.
Once you’ve gotten your line, you can then tackle which method you want to use for shortening.
4 Ways To Shorten Your Dress
In the absence of a sewing machine, there are still many ways to shorten clothing. Some are temporary, and some are permanent. Here are a couple ways you can achieve the length you want on a dress:
1 – Hem Tape
Hem tape is an easy-to-use tool with many varieties to choose from depending on your needs. There are tons of different widths, colors, and uses. Going to the store and trying to pick out a tape can seem overwhelming, but once you familiarize yourself with the main products, you’ll have a solution for everything.
A common choice is fusible hem tape, which only requires an iron to use, and creates a permanent hem that can withstand washing. Hem tape usually looks like a webby-material, and melts with the heat of an iron. The tape bonds on both sides to your fabric, so you can quickly and easily fuse fabrics together instead of sewing. Always make sure to read the instructions on each tape for best results, but here is a general run-down of how it works.
HOW TO: Double-sided fusible hem tape
- To use hem tape, you’ll need scissors, a measuring tape, and an iron.
- First, measure the circumference of your hem and cut a strip of tape to fit along it. For assurance, you can cut it to slightly longer than your hem and trim at the end if needed.
- Turn the dress inside out. Fold your hem up and iron it alone first, creating a good crease. Then insert the hem tape between the two layers, either all at once and pinning, or working in sections to ensure even placement.
- Set your iron to the setting indicated on the package of your tape. Use a pressing cloth for delicate fabric. Then iron the hem down, pressing firmly and slowly along the dress. Always iron the fabric; never directly touch the iron to the tape.
Tip: Fusion happens as the tape cools, much like using a curling tool on hair. Avoid touching or peeling the tape while it’s still hot.
Depending on what fabric your dress is made from, you may need a specific kind of fusible hem tape. There are options for everything, such as stretch seam tape or heavyweight tape. Trying out a tape-type on a piece of scrap fabric that is similar to your dress is the best way to figure out which one is right for you.
For a non-permanent fix, there are tape options like removable fabric tape and temporary hem strips, neither of which require ironing.
HOW TO: Removable hem tape
- Each of these is set up like fusible hem tape, by turning the dress inside out and folding the hem.
- Then, take or cut the tape in strips, remove the backing, and adhere in between the hem. You’ll need to press down firmly to ensure the tape stays.
- Once you’re done, you can remove the tape easily and iron out the dress for its next use.
Hem tape comes in so many different forms and can be used for everything from shortening dresses to hemming pants, so even if you don’t choose this method it still pays to go out and get some hem tape anyway. You never know when you’ll need to dip into your tools and use it.
2 – Fabric Glue
Fabric glue is an even easier way to secure a hem, as no other tools are needed to use it. There are many kinds of glue, from craft glue (permanent) to basting glue (temporary); a little research will help finding which one is best for your needs. Some fabric glues are washable and some are not, so read the packaging to confirm what kind you’re getting.
HOW TO: Permanent fabric glue
- Turn the dress inside out and fold the hem up where you want it. Iron down the crease for the cleanest edge. Then open the hem up again.
- Read the instructions on the package for details, but most glues either have an applicator tip or wand. Apply the glue on the hem and spread it around for an even finish.
- Fold the hem back up and press firmly with your hands to seal it up. If you’re using a temporary glue, follow the instructions to dissolve it, but washing or a little bit of water will likely do the trick.
Fabric glue is another tool every seamstress or crafter should have in their kit regardless of project. From adhering jewels to a jacket to fixing a bit of carpet, fabric glue is endlessly flexible and useful.
3 – Safety Pins
Safety pins might not be the prettiest solution, but if you already have them on-hand and don’t have time to shop, they can work just fine.
HOW TO: Safety pins
- To get the best method with pins, you’ll also want to iron the marked fold first. This will ensure your hem is clean, and help keep it folded.
- You can turn the dress inside out, but having access to the outside will be key here. Pin the hem to the dress, starting at the side seams, then pin at the front and back of the dress hem. Safety pin from the inside out, so the pins live on the inside of your dress.
- Additional pins can be added around the hem if needed. If your fabric is thin or flowy, try and catch the least amount of fabric possible on the outside with the pins.
Pretty much every hobbyist knows about safety pins, but they really are infinitely versatile. Plus, if you find yourself needing to quickly and temporarily shorten certain garments often, you can always pick yourself up a couple different colors so the pins blend into the clothes. But whichever size or color you have, safety pins will always be there to save the day.
4 – Belt
Finally, if you’re about to leave and don’t have time to even pin the dress, you can always get creative with a belt.
HOW TO: Belt
- For this method, you’ll need to already be wearing the dress and standing at a mirror.
- If you’re going from super-long to short, you can fold the dress inside itself and tuck the ends into a belt around your waist.
- If you only need to shorten the dress by a few inches, you can draw the dress up towards the waist and either let the excess fabric flow out of the top over the belt, or try and belt over the folded area (this works best with a wide belt).
This method is the most creatively open method, so just move the dress around and play with how you shorten it. Because for this you’re in front of a mirror, you can really get a feel for how the end result is going to look right away, making things quick and easy.
What’s The Best Method For You?
Now you have four different ways of shortening your dress, all without sewing or cutting it. Which one should you use?
Only you can make the final decision, but here are some things to consider when choosing:
- Fabric: What fabric is your dress? Is it lightweight or heavy? Is the material stretch or non-stretch?
- Length: How long is the dress in the first place? How much do you need to shorten it? How much excess fabric will that leave you with?
- Time: How much time do you have to shorten the dress? Do you have time to shop or a budget with which to do so?
- Occasion: Will your fix need to be permanent or temporary? Will the person wearing the dress be standing and posing, or moving around and being active?
Answering these questions will narrow down your choices and make it a lot easier to settle on a tool. Safety pins are great for a stationary photoshoot or film set, but something like heavy bonding fabric glue is perfect for a wedding with dancing.
Final Thoughts
The methods to shorten a dress without sewing or cutting it listed here aren’t just beginner methods; even advanced sewists and stylists need them sometimes. Just make sure to continue and explore these and other tactics. It pays to be a master of hem tape, but also learning how to use fabric glue will almost certainly make you a better crafter all around. There is wisdom in combining certain methods, and experimenting with using them as a tool in addition to sewing. The only way to never advance is to never try anything at all. So pick up the needle or turn on the iron; the first step is hardest, but will set you on the path to crafting your dreams.
Meg Stoll Tron is a writer and hobbyist from Petaluma, California. Always interested in fashion, Meg began sewing in college for theatrical productions and later moved on to making whatever creations struck her fancy. Meg loves using found fabrics, draping her own designs, and sitting by the fire with a nice hand stitching project.